
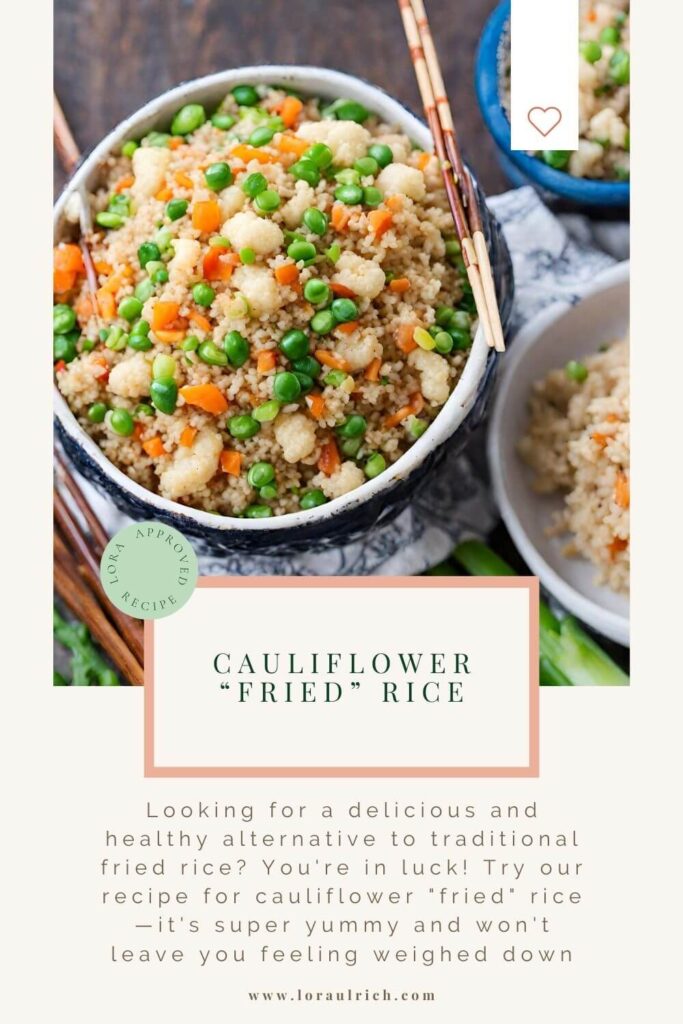
Looking for a delicious and healthy alternative to traditional fried rice? You’re in luck! Try our recipe for cauliflower “fried” rice—it’s super yummy and won’t leave you feeling weighed down. This low-carb, gluten-free dish is packed with flavor and veggies, making it a perfect side dish for any meal. Give it a try and see for yourself how cauliflower can transform into a satisfying rice substitute!
Who Might Benefit from Cauliflower Rice vs Traditional Rice:
- Individuals on Low-Carb Diets: Cauliflower rice is a great option for those following low-carb or keto diets, as it provides a low-calorie, low-carbohydrate alternative to traditional rice.
- Those Looking to Increase Vegetable Intake: Cauliflower rice is an excellent way to incorporate more vegetables into your diet, providing added nutrients and fiber compared to traditional rice.
- Individuals with Blood Sugar Concerns: Cauliflower rice has a lower glycemic index compared to traditional rice, meaning it has less of an impact on blood sugar levels. This makes it a suitable option for individuals with diabetes or those looking to manage their blood sugar levels.
- People Seeking Variety: Traditional rice offers a wide range of varieties, flavors, and textures to suit different tastes and preferences. If you enjoy the taste and texture of rice and are not concerned about carbohydrates or calories, traditional rice may be the preferred choice for you.
Pro Tips for Preparing the Best Cauliflower “Fried” Rice:
- Choose Fresh Cauliflower: Opt for fresh cauliflower with tightly packed florets and no brown spots. Fresh cauliflower will yield the best texture and flavor for your cauliflower rice.
- Properly Prep the Cauliflower: Wash the cauliflower thoroughly and pat it dry with a clean kitchen towel or paper towels. Remove any green leaves and trim the stem, but keep the core intact as it contains valuable nutrients.
- Use a Food Processor: A food processor is the easiest and most efficient tool for making cauliflower rice. Simply cut the cauliflower into small florets, place them in the food processor, and pulse until the cauliflower resembles rice-like grains. Be careful not to over-process, as this can result in a mushy texture.
- Don’t Overcrowd the Food Processor: Work in batches if necessary to avoid overcrowding the food processor. Processing too much cauliflower at once can lead to uneven results and may result in larger chunks of cauliflower.
- Use the Pulse Function: Pulse the cauliflower in short bursts rather than continuously processing it. This helps to achieve a more uniform texture and prevents the cauliflower from becoming too fine or mushy.
- Stop Before It’s Too Fine: Stop pulsing when the cauliflower reaches a rice-like consistency with small, uniform grains. Avoid processing it too finely, as this can result in a mushy texture similar to couscous.
Top Cooking Tips for the Best Cauliflower “Fried” Rice:
- Sauté for Best Flavor: While cauliflower rice can be eaten raw, sautéing it in a skillet with a bit of oil or butter enhances its flavor and texture. Heat a skillet over medium heat, add a small amount of oil or butter, then add the cauliflower rice and sauté for 5-7 minutes until tender but still slightly crisp.
- Season to Taste: Season the cauliflower rice with salt, pepper, and any other desired spices or herbs to enhance its flavor. You can also add minced garlic, diced onions, or other aromatics for extra flavor.
- Avoid Overcooking: Be careful not to overcook the cauliflower rice, as it can quickly become mushy and lose its texture. Cook it just until tender but still slightly firm to the bite.
- Use Immediately or Freeze: Serve the cauliflower rice immediately as a side dish or base for stir-fries, curries, or grain bowls. Alternatively, you can freeze it in airtight containers or freezer bags for later use. Just thaw it in the refrigerator overnight before reheating.
By following these tips, you’ll be able to make delicious and flavorful cauliflower “fried” rice that’s perfect for a variety of dishes. Enjoy experimenting with different seasonings and flavor combinations to create the perfect cauliflower rice for your meals!
Print
Cauliflower “Fried” Rice
- Prep Time: 5 minutes
- Cook Time: 15 minutes
- Total Time: 20 minutes
- Yield: 4 Servings 1x
- Category: Side Dish
- Diet: Gluten Free
Description
Looking for a delicious and healthy alternative to traditional fried rice? You’re in luck! Try our recipe for cauliflower “fried” rice—it’s super yummy and won’t leave you feeling weighed down. This low-carb, gluten-free dish is packed with flavor and veggies, making it a perfect side dish for any meal. Give it a try and see for yourself how cauliflower can transform into a satisfying rice substitute!
Ingredients
5 scallions chopped
2 large carrots, shredded
1 –24oz bag of frozen cauliflower rice
1 inch of ginger, chopped
2 cloves of garlic, chopped
6 tablespoons organic tamari OR coconut aminos
2 teaspoon apple cider vinegar
1 teaspoon toasted sesame oil
1 cup frozen peas
1 small can of water chestnuts, diced
Pinch of sea salt
Instructions
- Prepare the Ingredients: Chop the scallions, ginger, and garlic. Shred the carrots. Drain and dice the water chestnuts.
- Sauté Aromatics: In a large skillet or wok, add the chopped scallions, shredded carrots, ginger, garlic, and choose either organic tamari or coconut aminos. Sauté for 3-4 minutes until the vegetables are softened.
- Cook the Cauliflower Rice: Add the frozen cauliflower rice to the skillet and stir well to combine with the aromatics. Sauté for about 7-10 minutes, stirring occasionally, until the cauliflower rice has absorbed all the liquid and is cooked through.
- Add Peas and Water Chestnuts: Once the cauliflower rice is cooked, add the frozen peas and diced water chestnuts to the skillet. Sauté for another 1-2 minutes until the peas are heated through.
- Serve and Enjoy: Remove the cauliflower “fried” rice from the heat and season with a pinch of sea salt to taste. Serve hot as a flavorful and nutritious side dish or add your favorite protein to make it a complete meal!
Choosing Between Organic Tamari or Coconut Aminos – Which is Right for You?
Organic Tamari:
- Benefits: Organic tamari is a gluten-free soy sauce alternative that adds depth of flavor to dishes. It is traditionally made from fermented soybeans and has a rich, savory taste with a hint of umami. Tamari is also known for its higher protein content compared to regular soy sauce, as it typically contains less water and more soybeans.
- Differences: Tamari differs from traditional soy sauce in that it contains little to no wheat, making it suitable for those with gluten sensitivities or allergies. It also tends to have a darker color and richer flavor profile due to its fermentation process and higher soybean content.
- Who Might Benefit: Individuals with gluten sensitivities or allergies, as well as those following a gluten-free diet, may prefer tamari over traditional soy sauce. Additionally, individuals seeking a richer and more intense flavor in their dishes may opt for tamari for its depth of flavor and umami notes.
Coconut Aminos:
- Benefits: Coconut aminos are a soy-free alternative to soy sauce, made from the sap of coconut blossoms. They provide a sweet and savory taste without the soy, making them suitable for individuals with soy allergies or sensitivities. Coconut aminos also contain essential amino acids, vitamins, and minerals, and are lower in sodium compared to soy sauce.
- Differences: Coconut aminos have a milder flavor compared to tamari, with a slightly sweet and less salty profile. They are also naturally gluten-free, making them a suitable alternative for those with gluten sensitivities or following a gluten-free diet.
- Who Might Benefit: Individuals with soy allergies or sensitivities, as well as those seeking a lower-sodium alternative to soy sauce, may prefer coconut aminos. Additionally, individuals looking for a milder and slightly sweeter flavor in their dishes may opt for coconut aminos over tamari.
Choosing Between Tamari and Coconut Aminos:
- Taste Preference: If you prefer a richer, more intense flavor with hints of umami, organic tamari may be the better choice for you. On the other hand, if you enjoy a milder, slightly sweet flavor profile, coconut aminos might be more to your liking.
- Dietary Restrictions: Consider your dietary restrictions when choosing between tamari and coconut aminos. If you have gluten sensitivities or allergies, tamari is the gluten-free option. If you have soy allergies or sensitivities, coconut aminos are the soy-free alternative.
- Health Considerations: Both tamari and coconut aminos offer health benefits, but coconut aminos are lower in sodium and contain additional nutrients compared to tamari. If you’re watching your sodium intake or looking to incorporate more vitamins and minerals into your diet, coconut aminos may be the preferred choice.
Ultimately, whether you choose tamari or coconut aminos, you’ll enjoy this tasty cauliflower “fried” rice that’s sure to please your taste buds.
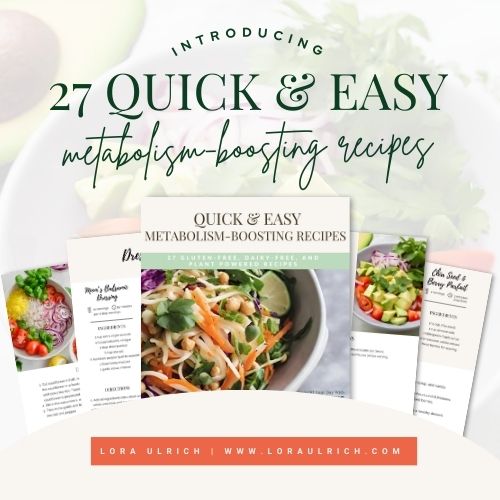
For more Quick & Easy Metabolism-Boosting Recipes, click here!


+ show Comments
- Hide Comments
add a comment